# Blending and Animations

## Overview

After setup, the Overlay pose isn’t active in-game yet:

<figure><img src="https://1519747473-files.gitbook.io/~/files/v0/b/gitbook-x-prod.appspot.com/o/spaces%2FrZsugF4ifwEvaFE7BvLB%2Fuploads%2FohIEBhV2DOy7JbOVOSwG%2Fimage.png?alt=media&#x26;token=8f89ef91-c7bc-4e22-9080-a49886701a2f" alt="" width="219"><figcaption><p>Character standing.</p></figcaption></figure>

The character should hold a torch, but until curve blending is set up, the Overlay isn’t visible.

## Adding Curves

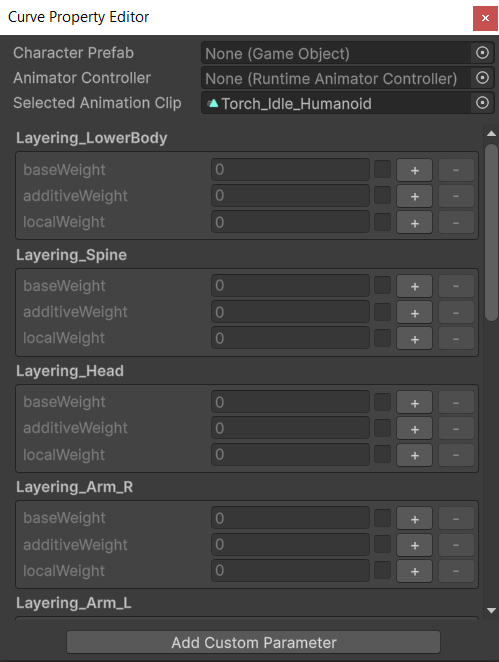
Right-click the Animation Clip and choose **Edit Curve Properties**:

<figure><img src="https://1519747473-files.gitbook.io/~/files/v0/b/gitbook-x-prod.appspot.com/o/spaces%2FrZsugF4ifwEvaFE7BvLB%2Fuploads%2F42rX4EHABu8KM0J26k9d%2Fimage.png?alt=media&#x26;token=f52944ef-67eb-4617-816e-10459ee8f4ac" alt="" width="374"><figcaption><p>Curve property editor.</p></figcaption></figure>

The Curve Property Editor adds custom float properties to a clip. Enter Play Mode and adjust the blending sliders.

To learn more about curve blending, see:

{% content-ref url="../../character-animation-system/layered-blending" %}
[layered-blending](https://kinemation.gitbook.io/character-animation-system-docs/character-animation-system/layered-blending)
{% endcontent-ref %}

After you adjust the curves, the Overlay blends naturally with the Animator output:

<figure><img src="https://1519747473-files.gitbook.io/~/files/v0/b/gitbook-x-prod.appspot.com/o/spaces%2FrZsugF4ifwEvaFE7BvLB%2Fuploads%2FhPK9915lqlInpSVXu1bL%2Fimage.png?alt=media&#x26;token=ec2c2082-7a4f-4948-b288-ec0d2172a4c7" alt="" width="221"><figcaption><p>Torch overlay.</p></figcaption></figure>

***

The next page will focus on procedural animation workflow.
